How we Progress and Teach the Deadlift!
Training at Trilogy follows a lot of structure but we include a lot of flexibility and fun in training. We focus primarily on our basic movement patterns – Push, Pull, Hinge, Squat and Carry. We covered squats here: Link to Squat Blog so here we are going to chat all about why and how we deadlift at Trilogy.
Scroll to the bottom for the TL/DR checklist!
The big lifts like deadlifts and squats tend to get a bad rep. This is often because they are:
- Done poorly with subpar technique.
- The wrong variation is done for the wrong person.
- They aren’t done with the proper purpose/intent/end goal in mind.
We love our deadlifts here because they train one of our favorite fundamental movement patterns, the hinge! The hinge is just hip extension which is the ability to control our torso and leg position as we push our hips back and forth through space. This is important because we learn to keep our backs neutral and really strengthen our hamstrings, glutes and our backs safely. When you hinge well, you unlock a world of potential with your strength and your body!
Not all deadlifts are created the same and not every deadlift will fit for every person. When we start deadlifting we make sure that each person has the right deadlift for them! In order to discover how to start deadlifting we do a couple tests.
- Active Straight Leg Raise: We lay on our backs and raise up one leg at a time to see how much each leg will actively move into flexion. This lets us see if there are any big differences in the left and right side of our body.
- Toe Touch: we simply see if we can touch our toes and we check out to see what that looks like: do you hinge, are you stiff, does your back round a lot with it, can you only reach your knees…all of these clues help us determine where you should start on the deadlift.
These tests give us some clues to where you will start!
Once we get moving there we do the PVC hinge, this is our first teaching moment for the hinge where we will teach you to sit back into your hips while keeping a neutral torso. We love all of our hinges (aka deadlifts) because they teach our hips and our back to work together. When we make this movement pattern smooth, we don’t rely on everything pulling through the lower back. We can move a lot more weight and we can protect our backs for the long haul!
Reminder: The reason we love our deadlifts is because we can safely strengthen our posterior chains. Your posterior chain is, in a super broad stroke, the entire back of the body from your back to your glutes into your hamstrings and calves. Fun bonus for you, our physical confidence improves as we learn to safely pick up heavy objects.
Strong muscles + good movement patterns + confidence = INDESTRUCTIBLE!!!
On to the lifting!
At Trilogy, we have some strength standards that we use to make sure everybody is ready for the next progression of the lift. Most of our people start with the kettlebell deadlift, when they progress up to the 123 lb kettlebell and can do that properly for 6-8 reps…they “graduate” to the bigger deadlifts and bars. This makes sure that everybody has practiced the lift enough to become proficient in the movement and we have enough strength to handle a larger weight. The biggest difference after the kettlebell deadlift is the bars and how the weight is distributed. Since we will now have to hold onto a bar, the weight is spread out further and our hand position shifts. We will need both the proficiency in the hinge and the strength to control the changes.
Now when it comes to picking the right deadlift for you, we always start around the same point with kettlebell deadlifts and then each individual will progress differently and to different stages of the deadlift. Conventional deadlifts (barbell deadlifts) from the floor are awesome and fun but they aren’t a good fit for everybody. Deadlifts off of the floor are perfect for powerlifting as that is the sport but if they don’t fit for your body and goals, we simply adjust the lift.
It is easy to find the right deadlift for you because it isn’t the actual deadlift that we care about! We care about getting you stronger, fitter and healthier and doing it safely. When we focus on what the hinge is supposed to do – strengthen your posterior chain and improve the rhythm and coordination with your hips and back we are no longer glued to 1 specific version of the exercise.
We have principles and standards guiding our choices rather than a training modality guiding our decisions. This way you get stronger and have less wear and tear on your body trying to force yourself into an exercise variation.
This is our general progression from Day 1 assessment to Deadlifting Professional!!
- PVC Hinge – This is our screening test and the very first movement we show people when they have no experience with lifting.
- We want to teach the hinge and basic movement, this lets us sit back and load our hamstrings and glutes.
- The PVC pipe acts as an external cue to help us maintain proper positions. It teaches us to keep our backs flat and to reach with our hips.
Start Position – Hold Contact with head, shoulders and hips
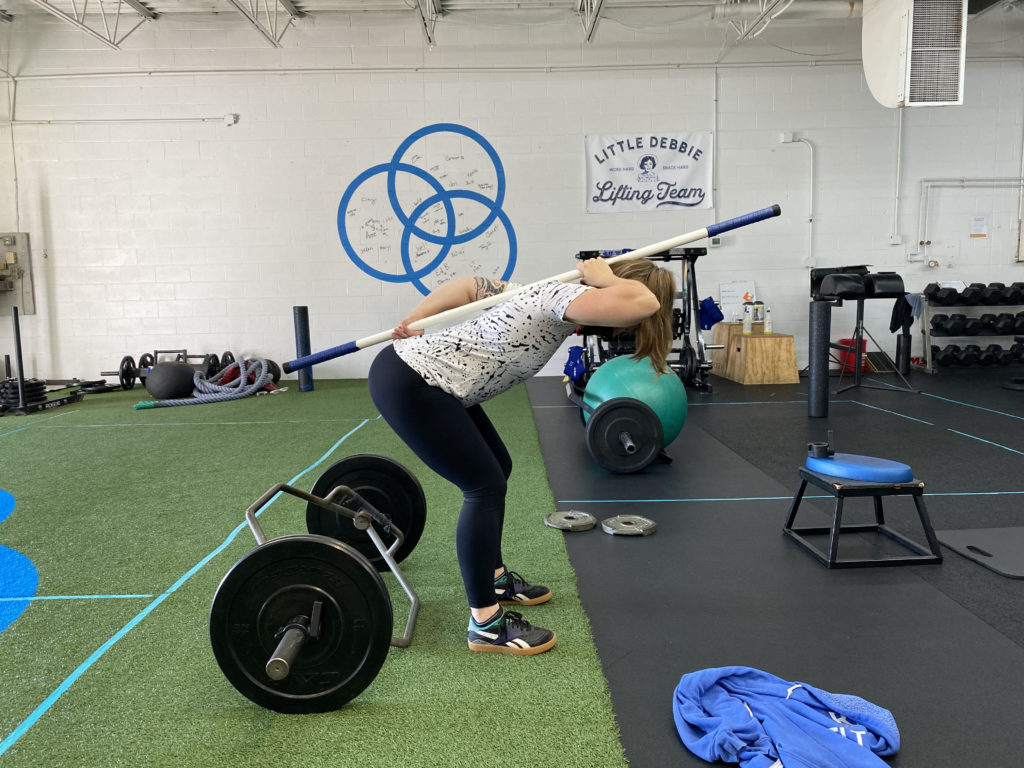
Maintain contact with PVC, reach hips back.
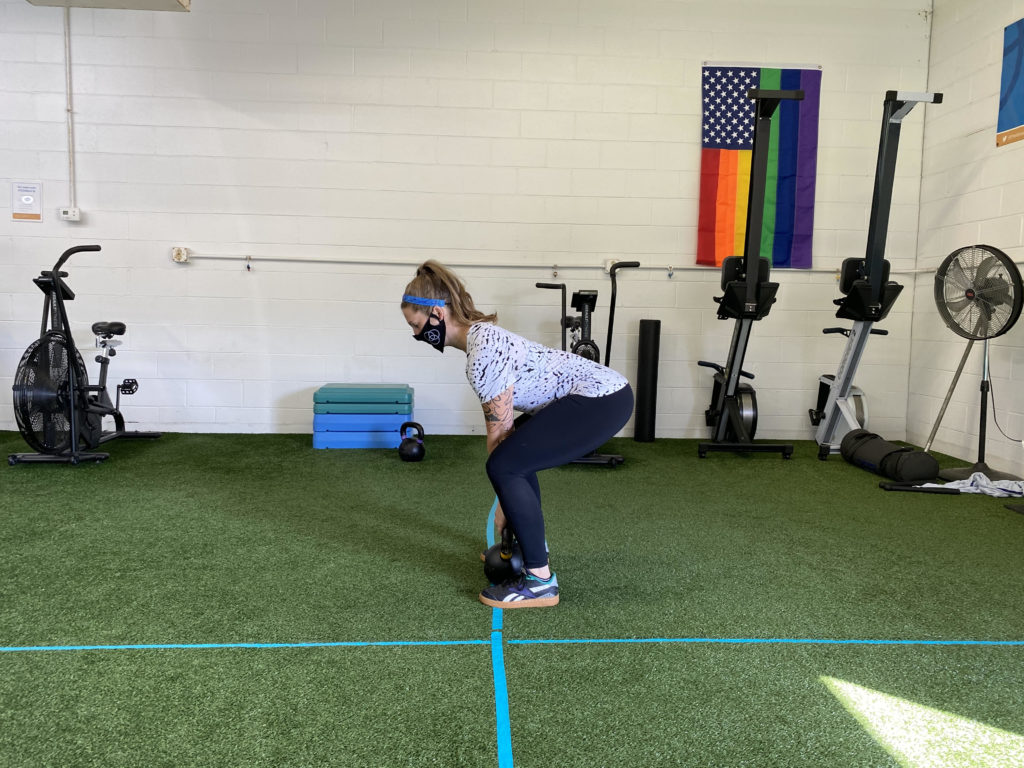
- KB DL from the block – This lets us load the hinge and control both the weight and the range of motion. As your strength increases, you will be able to control more motion and more weight.
- The centered weight allows us to maintain good tension and put us in good positions.
- Elevating the KB slightly allows us to make the positions even easier to get into as we learn the movement.

KBDL – Make sure the handle is even with your shoelaces
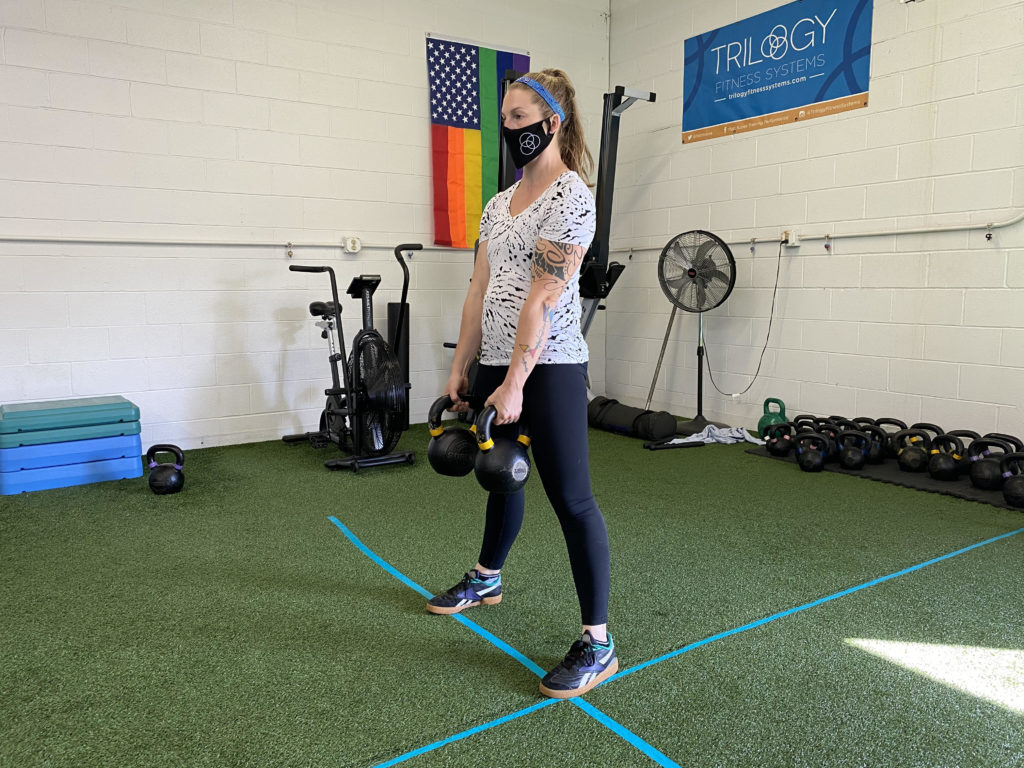
- KBDL from the floor – Once we nail the hinge with some weight, we remove the block and pull from the floor. After this the focus is on adding weight to get to our strength standard.
- Since we are getting stronger, we add a little more range of motion to challenge you!
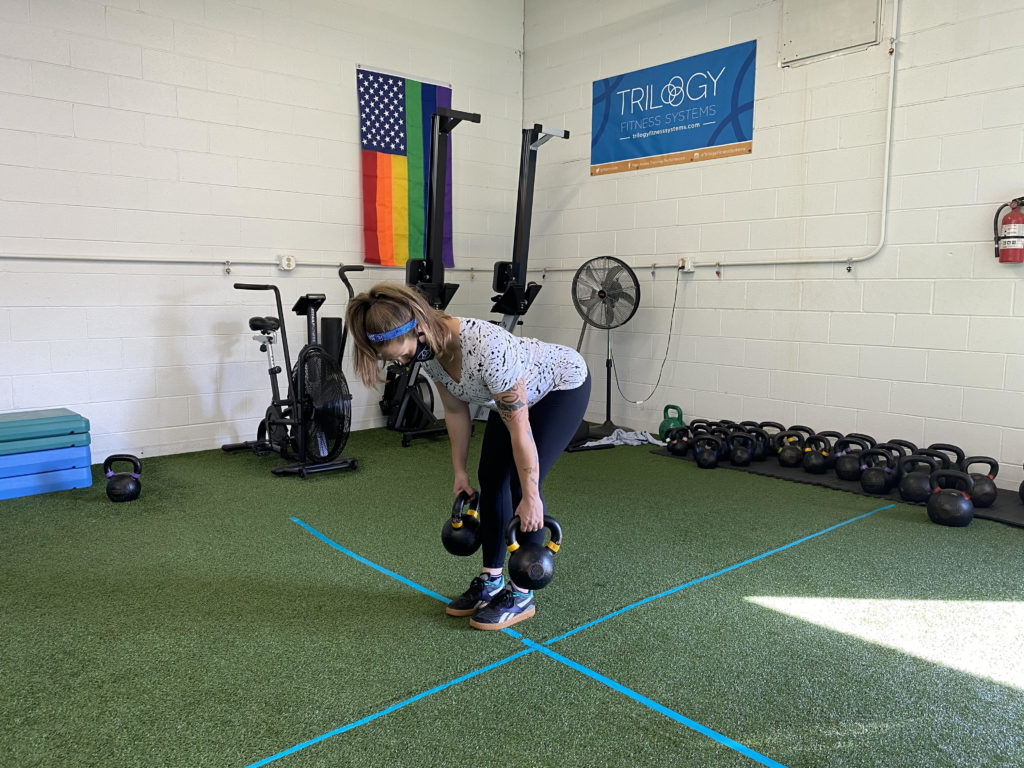
- DBL KB DL
- This gets us in a wider stance and teaches us to control individual weights using our LATS!! These guys lock in and do a lot of support work with the deadlift.
- The wider stance will also really get us using our GLUTES!
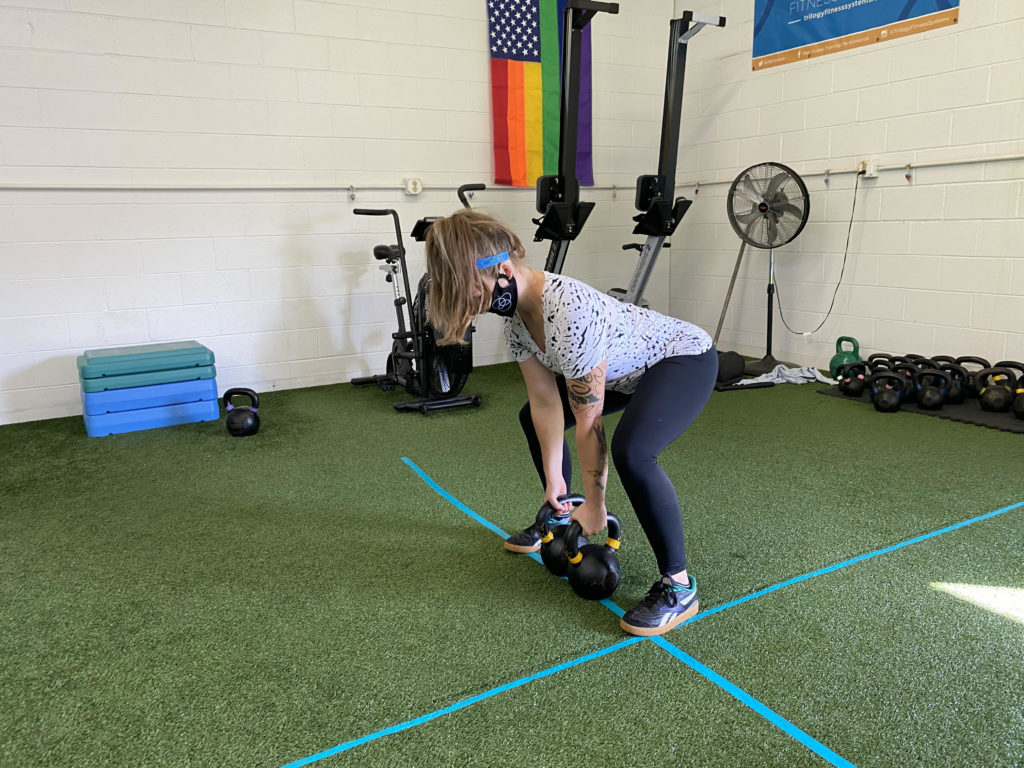
Same Position as the single KB but feet wider, gets more hips!
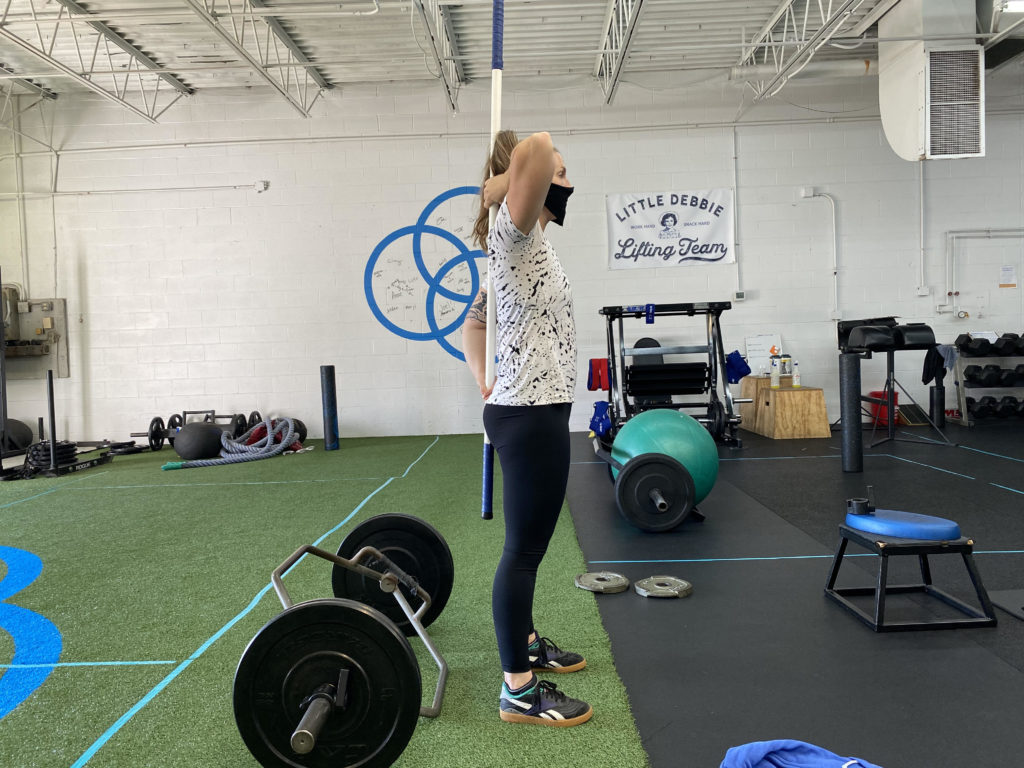
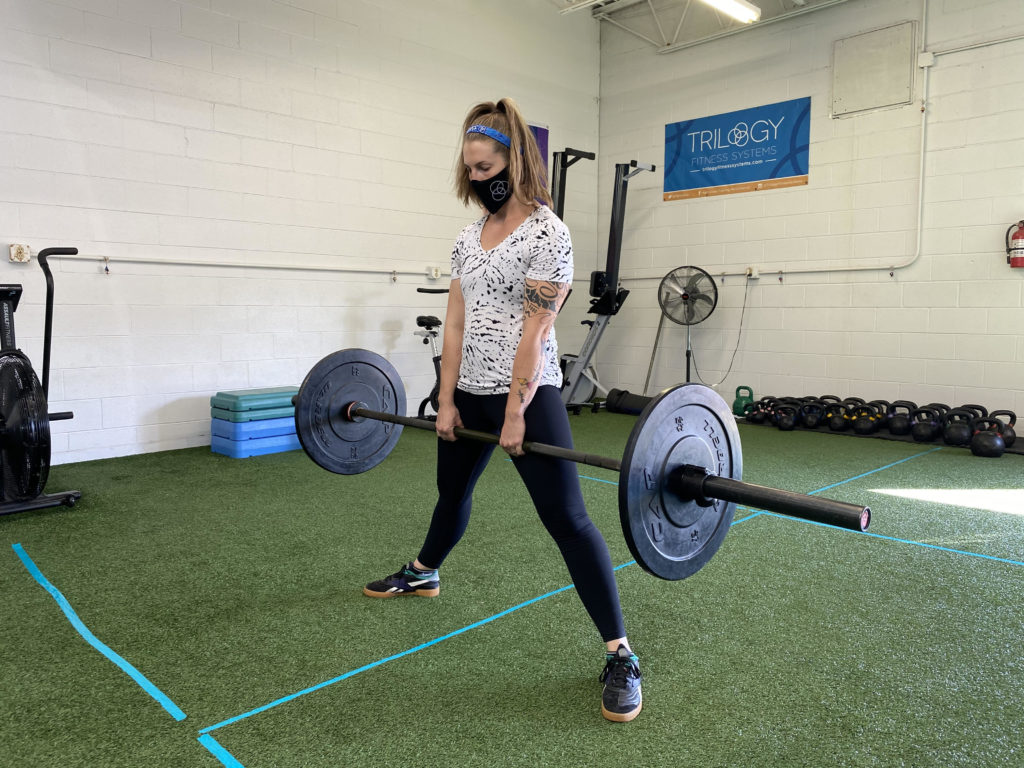
- RDL
- We can use a KB, 2 KBS, DBs or bars for this one!!!
- With the RDL(Romanian Deadlift) we are focusing on the top portion of the lift, hinging back to feel a stretch and loading into your hamstrings.
Kettlebell RDLs – Focusing on the top portion of the hinge and not pulling from the floor or block. The motion will be the same no matter the implement – KBs, DBs, Bars, Sandbags, Humans, Cars
Barbell RDL – Same as the KBs just with a different weight
Top of RDL – Again, this will look the same whether it is DBs, KBs or Bars
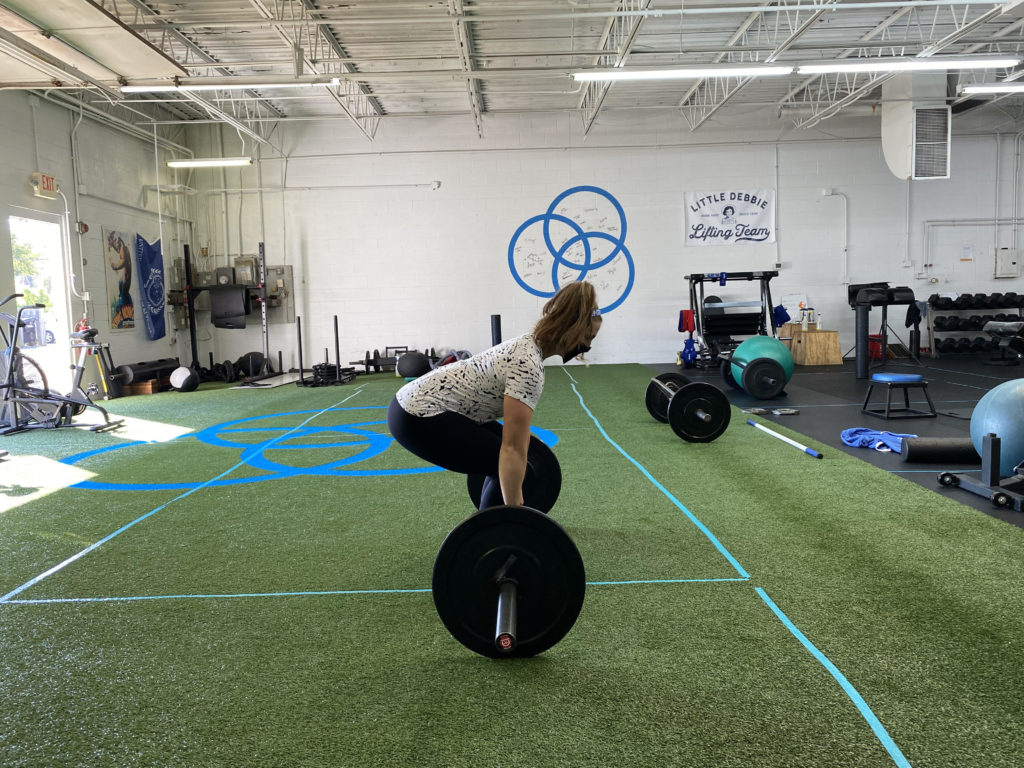
- Trapbar Deadlift
- Numbers 4 and 5 are interchangeable in order.
- This bar has higher handles and the weight is centered on the body, making it one of our favorite variations for people. It is pretty use to learn and very joint friendly.
- Since the handles are at your side – you will need to brace solid and really engage your lats to maintain position throughout the lift.

Trapbar Deadlift – Same Hinged position at the bottom, handles off to the side. The weight is centered more on your body with this bar.
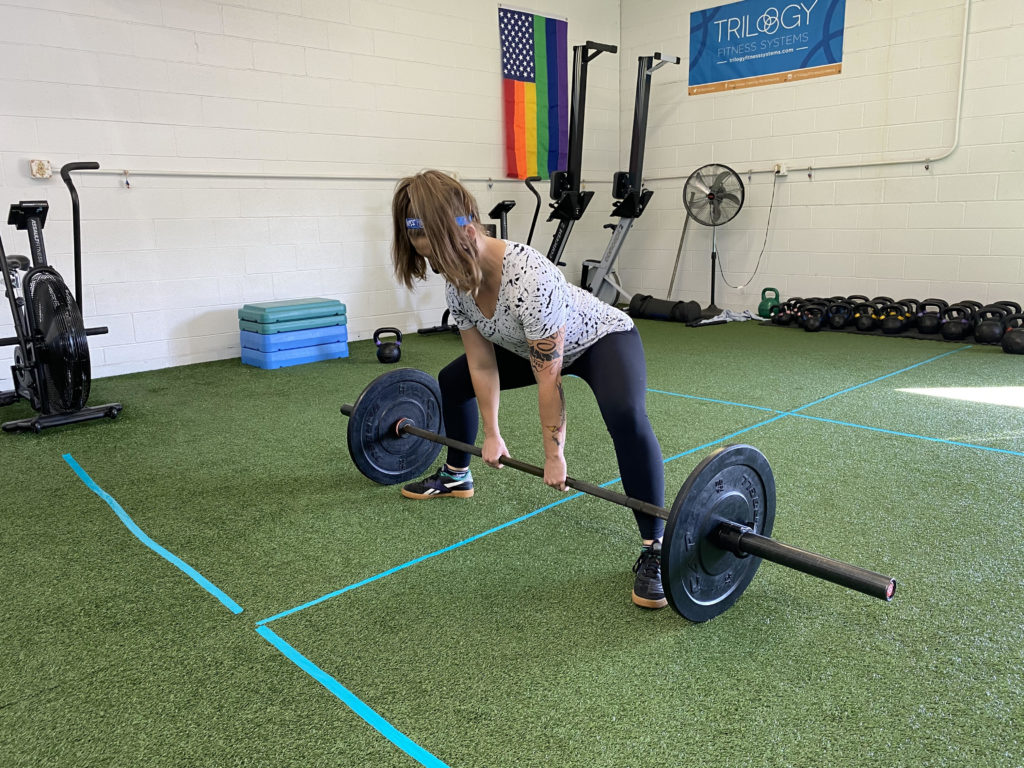
- Conventional/Semi-Conv/Sumo Deadlift
- Deadlifts have all kinds of variations that you can learn down the line!
- We can adjust with – bands, chains, grips, racks, blocks and deficits
- This set up will be very similar to the trapbar but with the bar and grip being just in front of your shins, the force changes slightly and will require you to stabilize slightly different.
- Conventional – feet hip width apart – requires more in the lower back.
- Semi-Conventional – Feet about shoulder width apart – a hybrid lift
- Deadlifts have all kinds of variations that you can learn down the line!
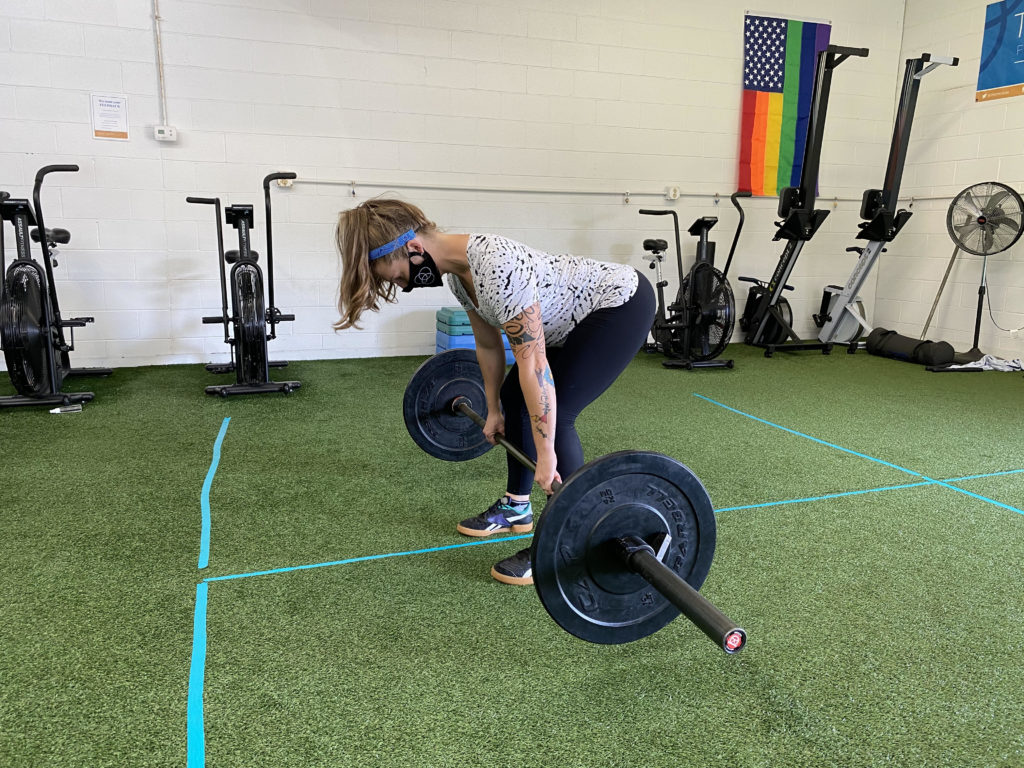
Bottom Position of Barbell Deadlift, Conventional Stance. Feet are hip width apart.
-
-
- Sumo – Feet outside shoulder width – requires more hip mobility, less requirement in the lower back
-
The bottom position of the sumo deadlift.
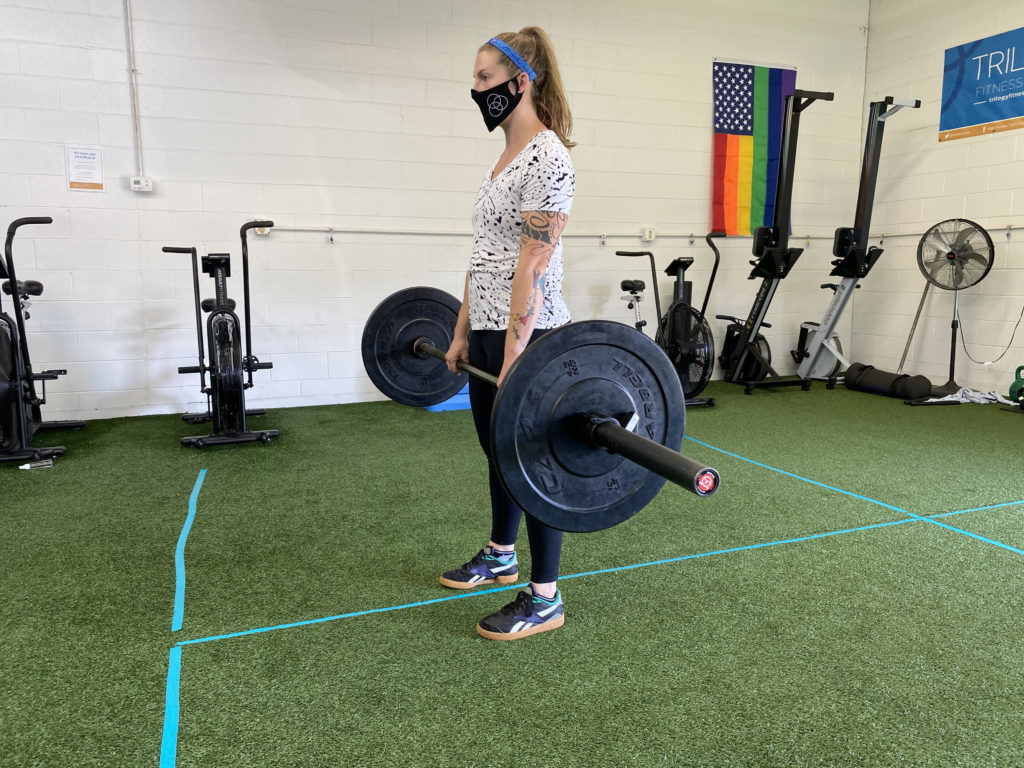
Sumo Deadlift – Top Position. Same Strong finish with the hips into a neutral lock out.
- Single Leg RDL – This deadlift teaches us to hinge and balance on one leg. It is important gain the ability to separate the movement into each leg. This is a continual practice that we will work with people on. We use it in both warm ups, with various loads and as a strength exercise. Since it is harder and harder to load heavily, most people skimp out on the Single Leg RDL…Don’t be like most people! Get strong and awesome with all of the lifts.
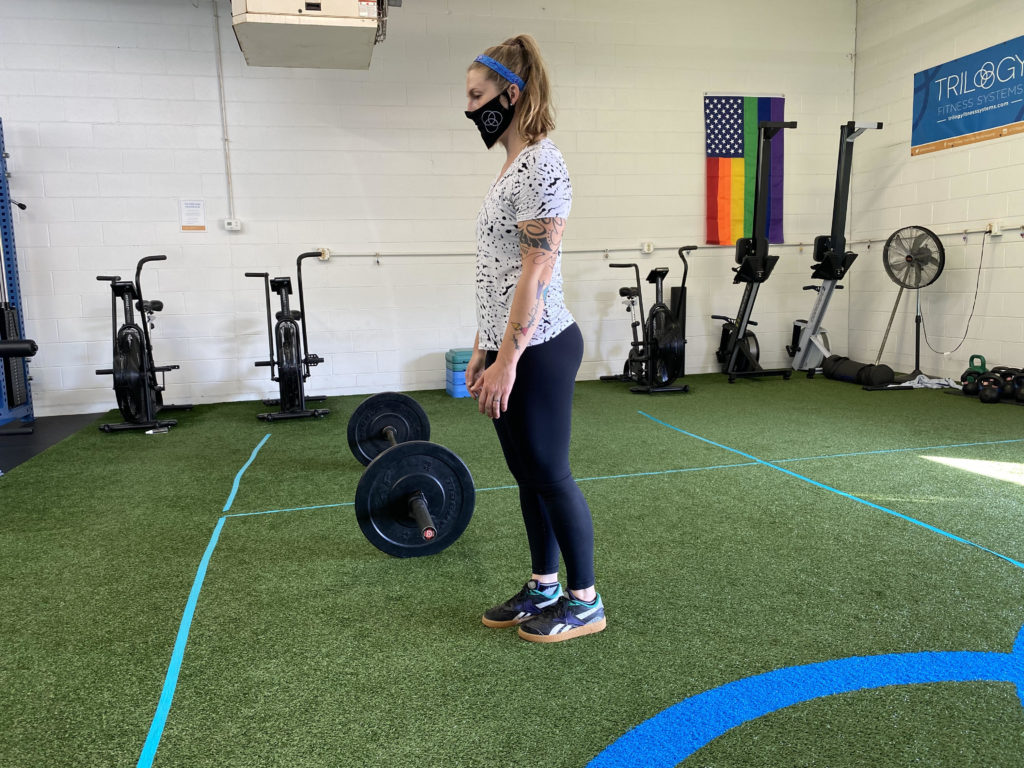
Is Helen just awkwardly standing here or getting ready to hinge on one leg?!
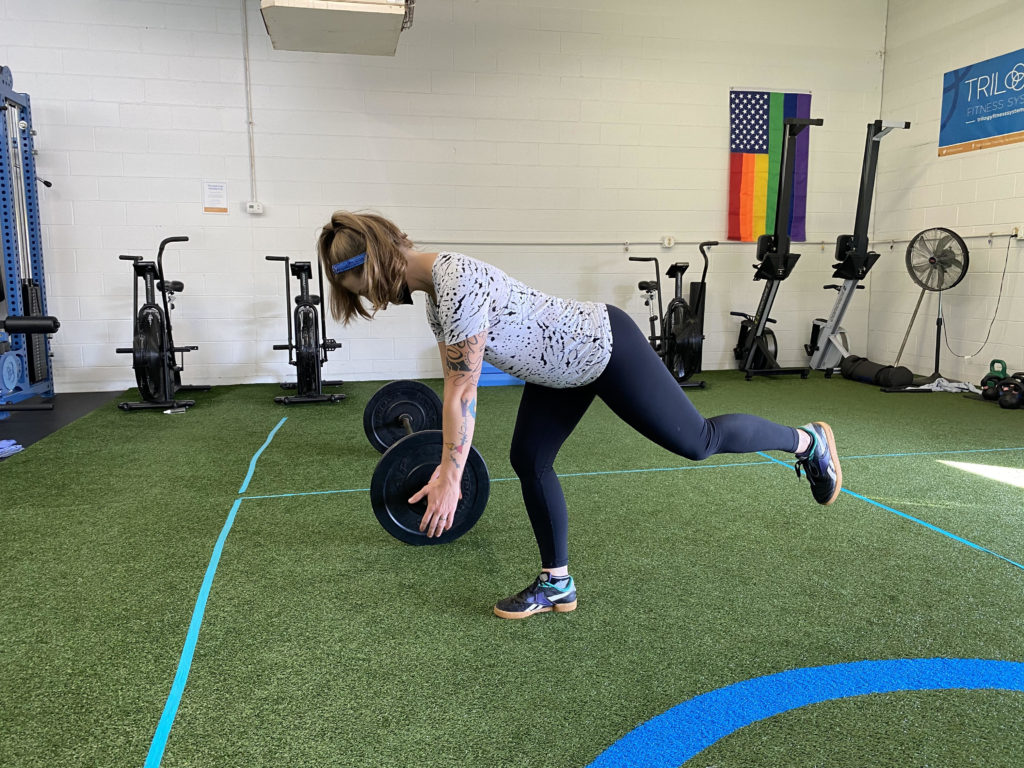
She is hinging on one leg!! Remember to keep your hips and your shoulders level and push your hips back just like if you were on 2 legs.
TL/DR Checklist:
- The Hinge is a fundamental movement pattern that we should always strive to safely train.
- Strong hamstrings and strong glutes will protect your back and knees.
- Getting Strong is really cool.
- Find the right deadlift version for you!
- This is based on experience, injury history, goals and body type! Line all of these up and the results will SKYROCKET!!!!
- Progressions will all involve an increase in weight, range of motion or implement.
- Once you have mastered all of these variations, you can implement them all at different times depending on the goal.
Technique Checklist:
- We want to keep pressure through the heel, big toe and pinky toe of the feet.
- We want to keep a strong brace – those abs should be engaged to keep our torso neutral.
- Lock your lats into place (imagine you are trying to block us form poking your arm pits) this will keep your shoulders down, help keep you neutral and let your body disperse the heavy weights you are holding onto.
- Create tension at the bottom of the lift, if you are picking it up off a block or the floor. You don’t want the weight to “shock” your body.
- We like to think about pulling yourself down into the start position with your lats and brace to really load and tension your muscles.
- Grip the bar hard and keep your arms locked out.
- Think about pushing through the floor to initiate the lift and finishing with your hips.
- At the top, finish in a strong plank position and initiate the lowering of the weight by shifting your hips back.
HAPPY DEADLIFTING!