This is awesome and a goal that we want EVERYBODY to accomplish.
Push-ups are one of our go to strength exercises in the gym!
It is one of the exercises that we push each client to be able to do. Most people coming into the gym, struggle with push-ups. The beauty of the push-up is that we are never too advanced for a push-up! We can endlessly progress, modify and adjust our push-ups to make them a staple in every person’s program, no matter the goal!

We like to use targets to make sure that we use full range of motion. This is especially helpful when we first shift to full ROM push ups from the floor.
When we want to improve our push-ups we see people missing their push-ups in 2 primary ways:
- Core Strength – they can’t hold a strong enough plank to move their body through space.
- Upper Body Strength – They just don’t have enough chest and arm strength.
When we start working towards our push-ups we want to make sure that we have an appropriate starting point. If we throw somebody into the fire and just say, “Drop and give me 20!”, they won’t have a good time with it and there is chance we can end up with some irritated shoulders and elbows since they aren’t ready for that level of push-up yet.
When we look at exercises, we always want to remember that QUALITY will ALWAYS beat QUANTITY! We also want to have an accurate image of where we should be, if 20-pound dumbbells are a piece of cake, we need to bump up the weight and on the flip side, if our push-ups have our elbows flaring and our hips collapsing to the ground, we likely need to adjust where we are and modify. (This has to be a pretty epic run on sentence.)
When you do your push-ups, we want to make sure that we remember a few key items in our checklist, so you know that you are crushing them:
- We want to make sure we hold a STRONG plank. People will often lose position through the core first by either sagging the hips or piking the hips up in the air.
- We keep our hands approximately underneath our shoulders – we don’t need them too wide or too close together.
- Keep your head neutral – one of the common things we see is jutting chins towards the ground. We want to stay in a straight line, not look like a turtle.
- Plank hard and push hard!!
- If we look at you from above, we want to be able to draw a triangle from the top of our head to our elbows. We don’t want elbows too close to our ribs or way out to the side – neither of these positions are shoulder friendly for the long term.
With push ups we hold a strong plank and want to keep our elbows angled at approximately 45 degrees. We don’t want them glued to our sides or flared out.
Now that you have your checklist in your mind, this is exactly how you can progress through the steps to crush their first push up from the floor and beyond!
Step 1 – POSITION!
We start with nailing a strong plank. If we can’t control this position in a static or stationary way, we won’t be able to control it while we move it. In the plank, we want to make sure we are bracing our core, flexing our lower body and pushing our forearms into the ground.
Plank – We want to engage our abs, quads and glutes as we actively push our elbows into the floor.
Step 2 – Modifications!
The following step is our less preferred modification – kneeling push-ups – we use these when we don’t have access to a bar that we can adjust and lower as we progress.
This version is perfect for at home or with limited equipment. The kneeling position puts less weight into your arms and reduces the demands on your core making the movement easier to execute. This allows us to get plenty of quality reps for the shoulders/chest/arms so that we can develop our strength safely.
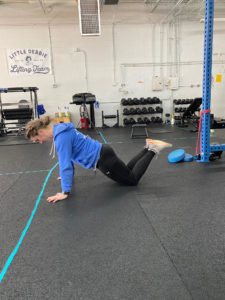
A Push Up regression that takes the plank stress away and reduces the amount of load into the arms to make push ups slightly easier.
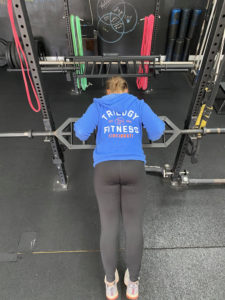
Our preferred modification, at Trilogy, is the hands elevated push up. We love this version because it teaches us to control our plank as we do push-ups. The other perk is we can track where we are on the elevation to continually progress the push-ups as we get stronger.
We use a “football bar” which is a barbell with parallel handles, and this is EVEN BETTER because it keeps our wrists neutral and puts our shoulders and elbows into a good position (Remember the triangle form our head to elbows?).
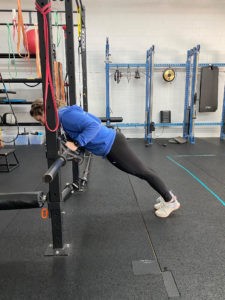
The bottom position of the hands elevated push up – reduced load into the hands from the incline and still maintaining a strong plank position.
As we do the hands elevated push-ups, we get to add all kinds of fun twists and tricks – we add tempos, which are just slowing down how fast we lower and raise ourselves, pauses and other programming tactics to get stronger as we progress towards a full push up.
We elevate the hands to make sure we have to hold a strong plank position. Notice the triangle from your head to your elbows.
One of our favorites is a 5 second lower with a 2 second pause at the bottom!
Step 3: We’re on the floor!
Once we start nailing some quality reps with the bar low, we add in eccentric push-ups and band assisted push-ups. Both allow us to gain strength from the ground and take advantage of where we are stronger.
For eccentric push-ups we want to slowly lower ourselves to the ground under control. We then drop to the knees and can push up from there. Since we are stronger as we lower ourselves, we can take advantage of the strength there to build towards our push-up.
With our band assisted push-ups, we use the band to assist where we need the help. We get assistance at the bottom position and as we press ourselves up.
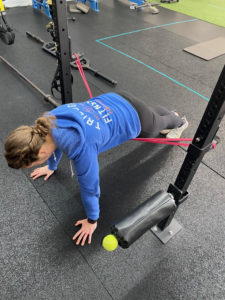
The band across the hips lets us reduce the weight at the bottom of the push up, where it is hardest. We use this frequently when people first shift to the floor for push ups.
Step 4: Push-Ups!
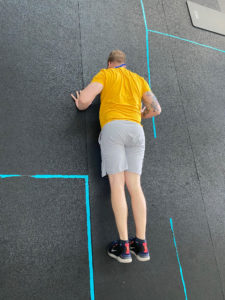
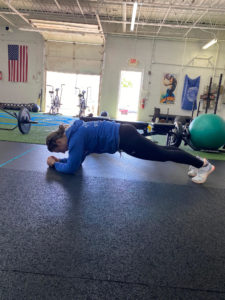
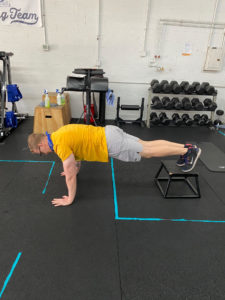
Now we are ready for PUSH-UPS! We like to add a target when we first start doing push-ups from the floor. We simply put a pad under our chests to make sure we are getting full range of motion. Once you start banging out reps left and right, we get to progress them!
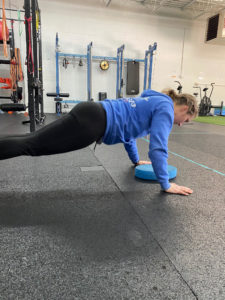
Notice the strong plank position. We place a pad underneath so we can make sure we hit a consistent range of motion on every rep.
Step 5: To Push-Ups and Beyond!
For progressions, we can use the same tricks we used above, we like our pauses and tempos! We can also adjust the leverages and the weights with feet elevated push-ups. For feet elevated push-ups, we shift our weight into the hands by elevating the feet and making them harder. In our weighted push-ups, we simply add weight to our body to make them harder.
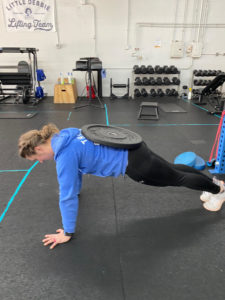
A Push Up Progression to add additional weight to your body to make push ups harder.
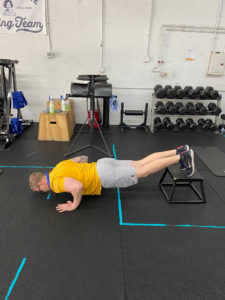
A progression that changes the angle of the body, shifting more weight into your hands to make push ups harder.
The top position of a feet elevated push up.
Now you have the secret sauce on how to progress and nail some push-ups. Make sure you show us how you are doing with the push-ups.
If you want to do push-ups with us, click here and come party with us!